
vBCms Comments
Welcome To Hunting Country
General Hunting Forums
Archery & Bowhunting
Shooting Sports
Manufacturers' Corner
Firearms
Classifieds
Not Hunting / General Chit Chat
1.) DParker - 07/21/2014
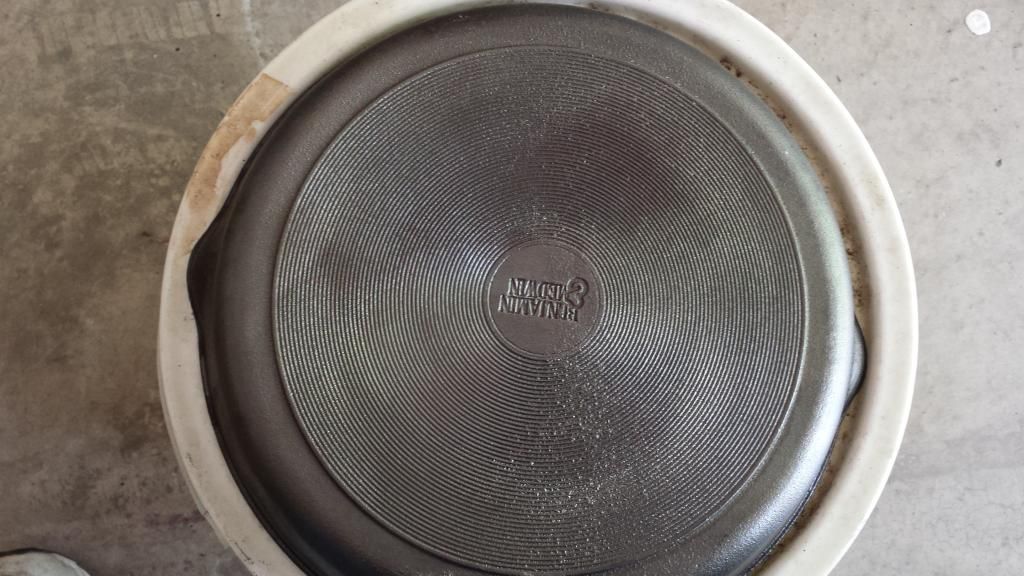
We have a cheap cast iron skillet that my wife bought from a Fred Meyer store when we briefly lived in Oregon some 23 years ago. We've used it from time-to-time for the usual trivial purposes like bacon and eggs, but I'm ashamed to say that I we both spent most of those years largely ignorant of the wonders of cast iron cookware, and the thing has mostly sat idle and neglected, and was never properly seasoned. My wife even used soap and water to clean it the few times that she used it (oh, the horror.) But after doing some reading on the topic and realizing what I've been missing out on, I've recently begun using it for things like browning chili meat, making cornbread, etc. And of course, the roux that I've always used it for. But as I said, the skillet was never properly seasoned, and has been neglected and mistreated, even developing rust on the bottom. So, inspired by something similar in a thread on another forum I regularly read I decided to make a mini project out of rehabilitating the iron beast and turning it into a respectable and valued member of the kitchen community. What follows
is a pictorial record of that effort. I'm not going to go over what cast iron seasoning is all about since there are plenty of resources on the web that explains the subject better than I could. So, without further ado...
In the old days cast iron cookware foundries commonly took the extra step of machining (or otherwise grinding) the insides of their skillets to a relatively smooth finish. But today, manufacturers mostly skip this step in order to keep costs down, resulting in a rough, pebbly finish. Needless to say this is not conducive to obtaining a non-stick cooking surface. So in addition to the seasoning I resolved to do something about that issue as well. Unfortunately I forgot to snap a good close-up pic to illustrate the problem, so just take my word for it...it was rough, and unevenly so.
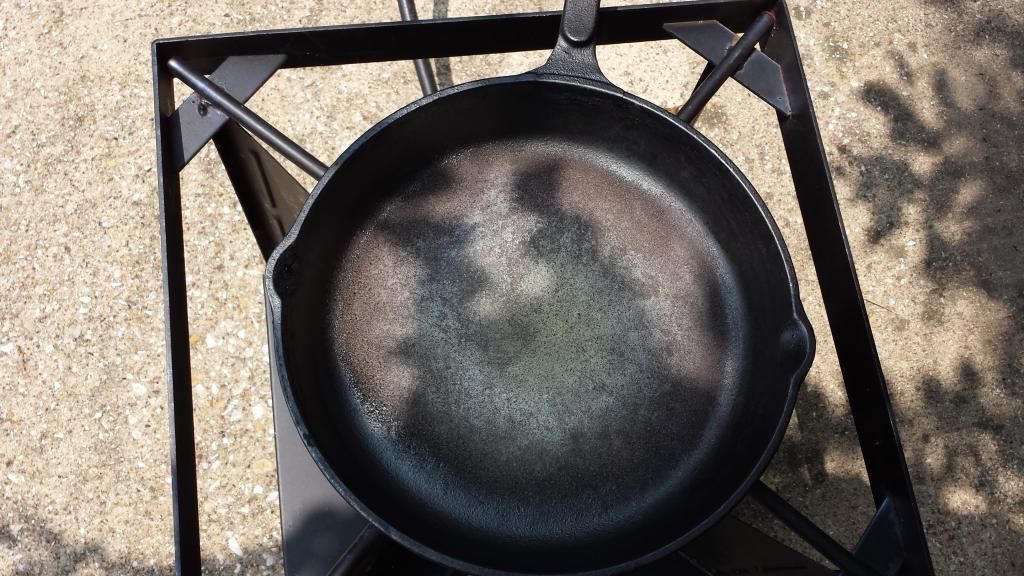
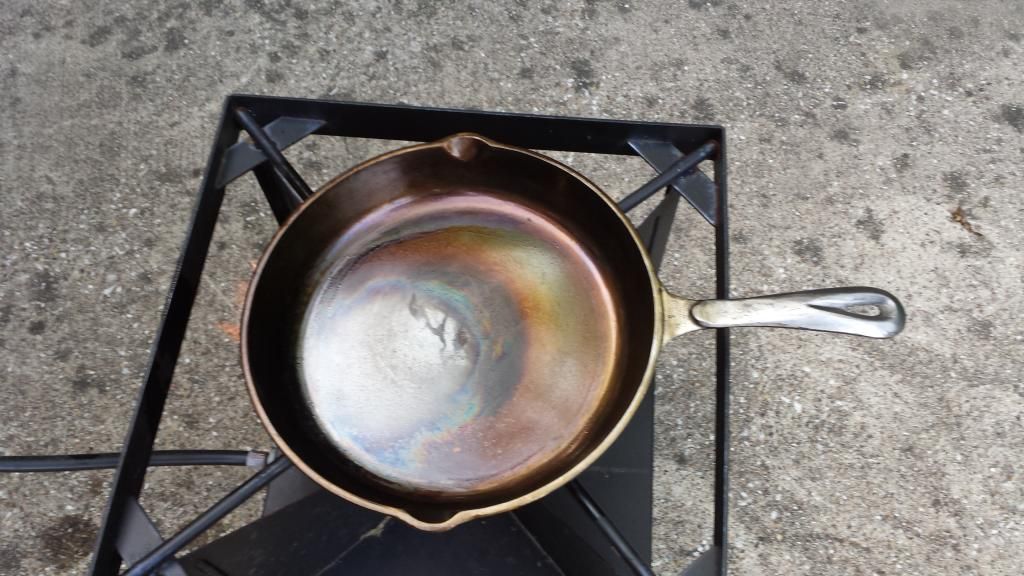
In any event, step one is removing the old half-assed "seasoning" (years of oil build-up). The most commonly recommended method for doing this is burning it off by putting the skillet in an oven on the self-cleaning setting (about 550� or so) for an hour, which burns the old oil deposits to an ash that is then easily removed. Easy, but it smokes like hell. So I decided instead to fire up the little jet engine that is my outdoor propane burner (those crawfish don't boil themselves, y'know) in the hopes that it would to the job in less time (due to the much higher heat it produces) and without setting off every smoke alarm in the house. And it did. After about 5 minutes of the fires-of-hell afterburner setting the oils were reduced to a fine ash:
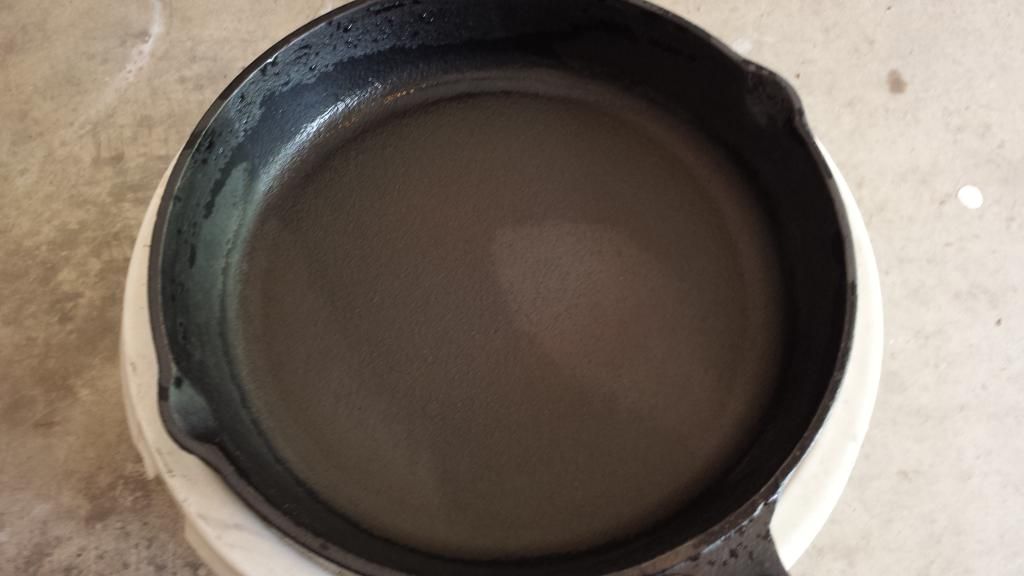
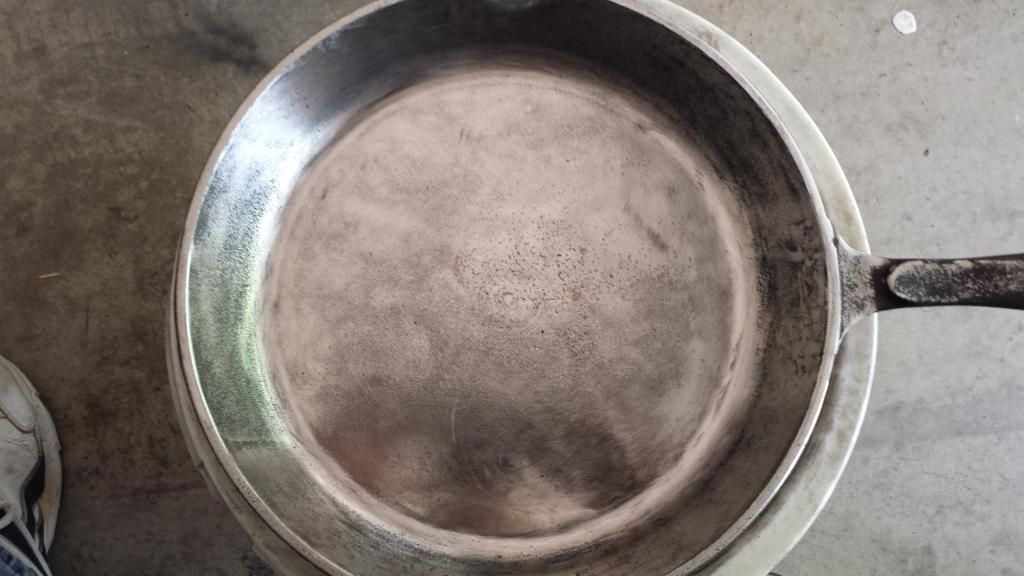
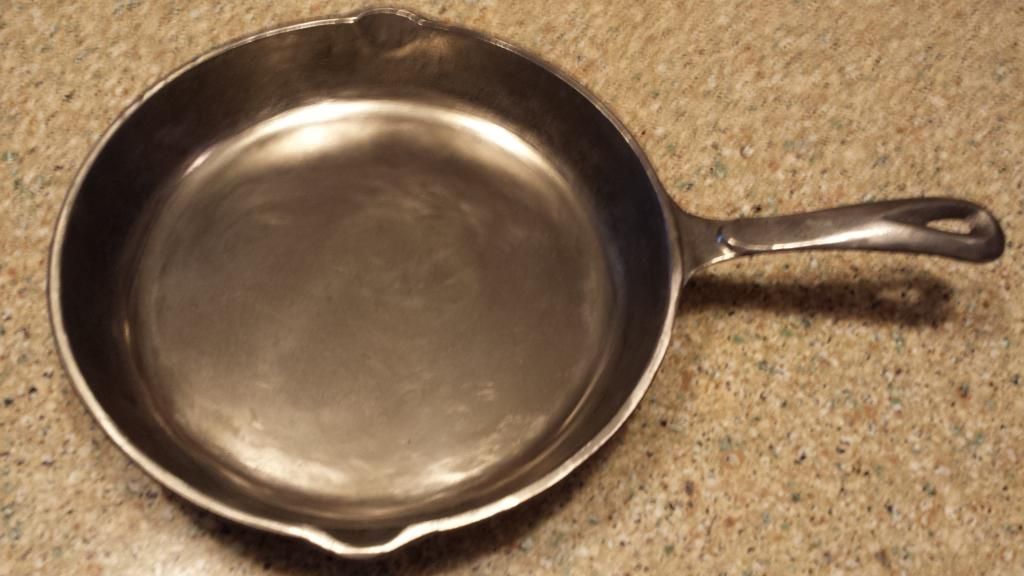
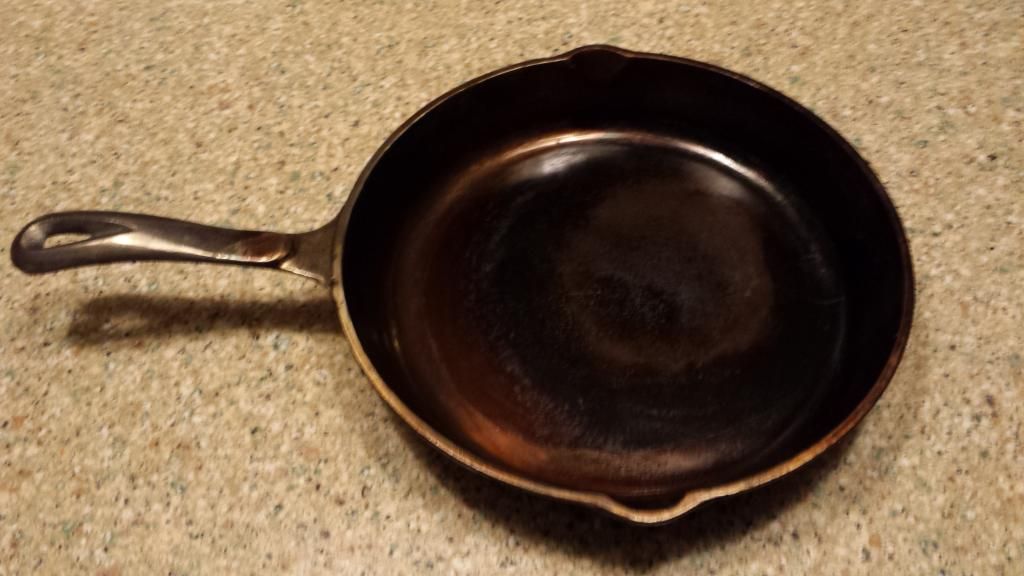
A little elbow grease and some steel wool removed the deposits and left me with the following ugliness:
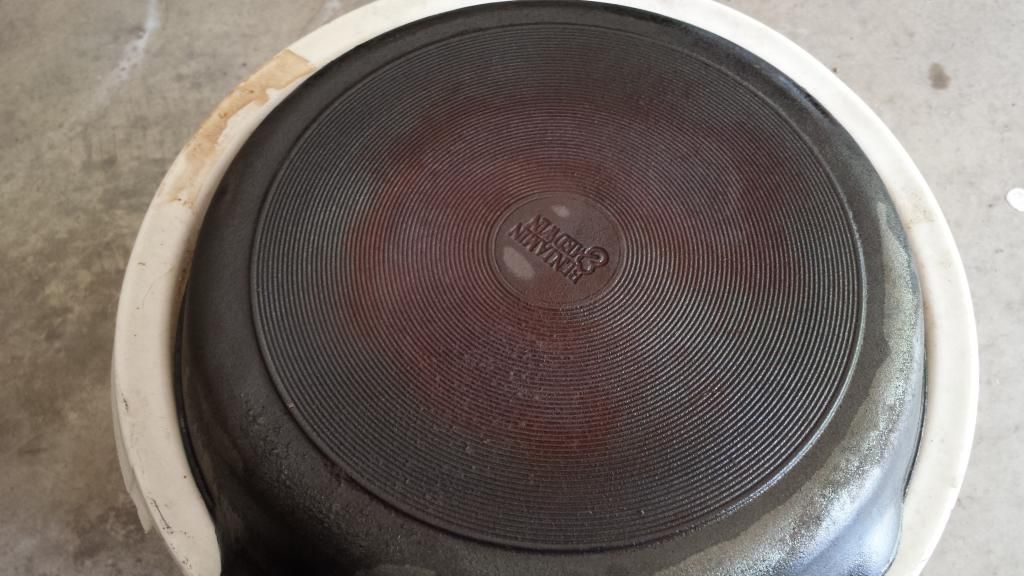
The underside was no better. Remember the rust I mentioned?
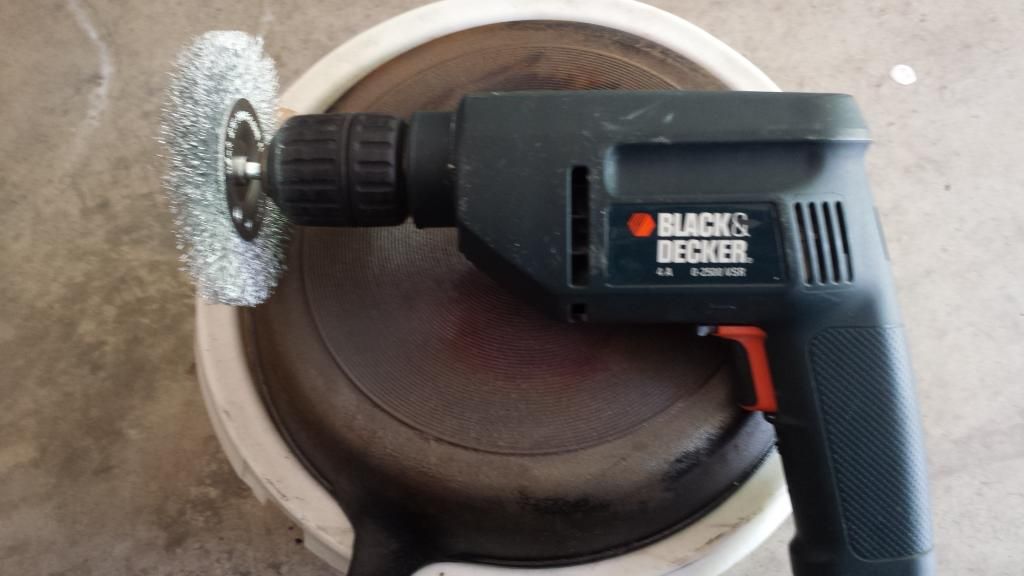
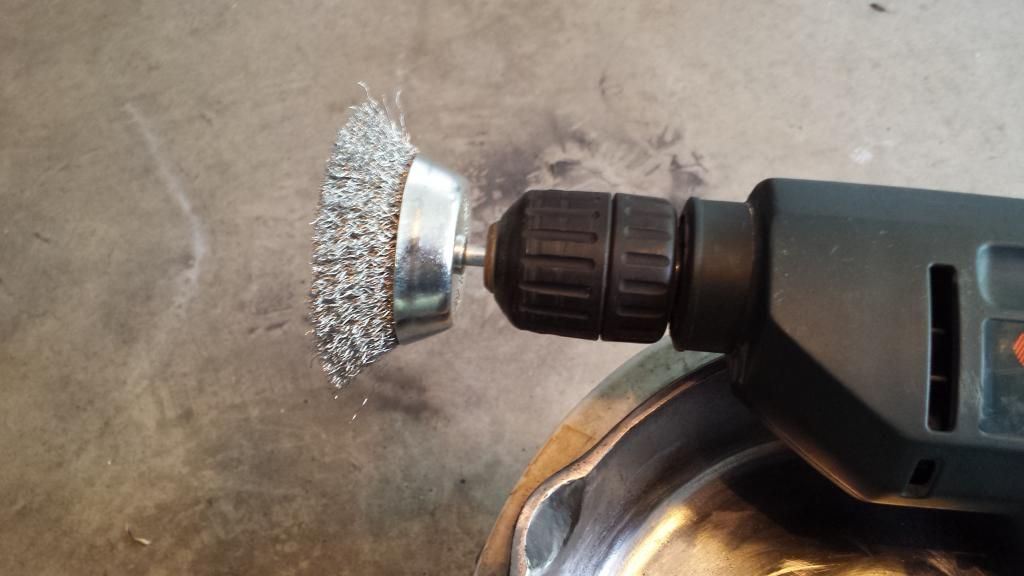
What to do? The correct answer is always...power tools. Specifically, a variable speed drill and steel wire brush wheel:
OK, much better:
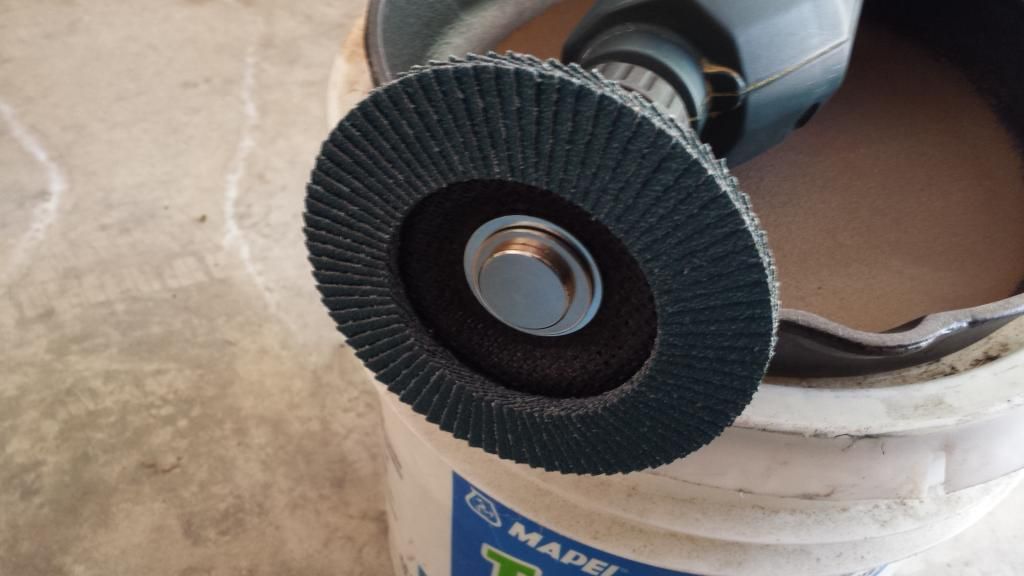
Now, it's time to grind the cooking surface into something that doesn't resemble the surface of the moon. Normally this would call for an angle grinder, but...well...I don't have an angle grinder. And as much as I love an excuse to buy a new power tool my garage is already bursting at the seams with tools, reloading stuff, hunting gear, etc, so I've reached the point where I actually have to justify new toys. So I opted to rely on a $5 adapter I picked up at home depot that allows you to chuck grinder wheels into a drill. Not exactly what a drill is built for, but I figured it could handle a small job like this. I started out with a 60 grit flap wheel:
OK, so controlling a drill while grinding iron ain't easy. It really wants to spin off and into low Earth orbit, but after a little bit I managed to get the hang of it. In short order I not only got down to bare metal, all of the raised spots were gone:
The dark spots you see are pitting, which is pretty bad. But my hope was that by the time the grinding and sanding were done the pits would be minimal and shallow, and easily filled in by multiple coats of polymerized oil (the "seasoning"). Next I switched to an 80 grit flap wheel and repeated the grinding step. The surface is now much smoother, and the depth of the pitting significantly reduced:
Then I switched to a 5" sanding disk and some 120 grit paper. A couple of minutes with that and we're almost there:
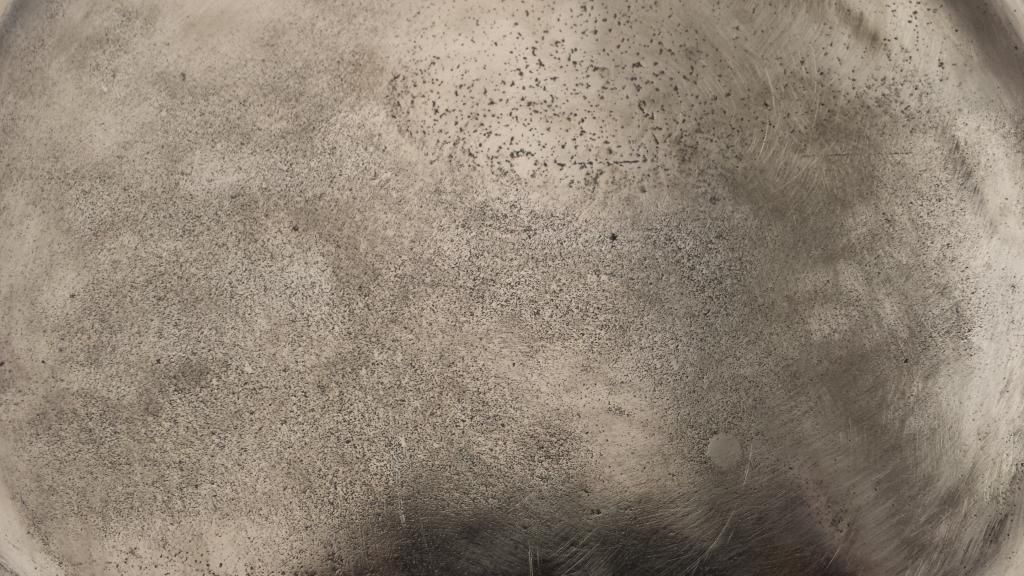
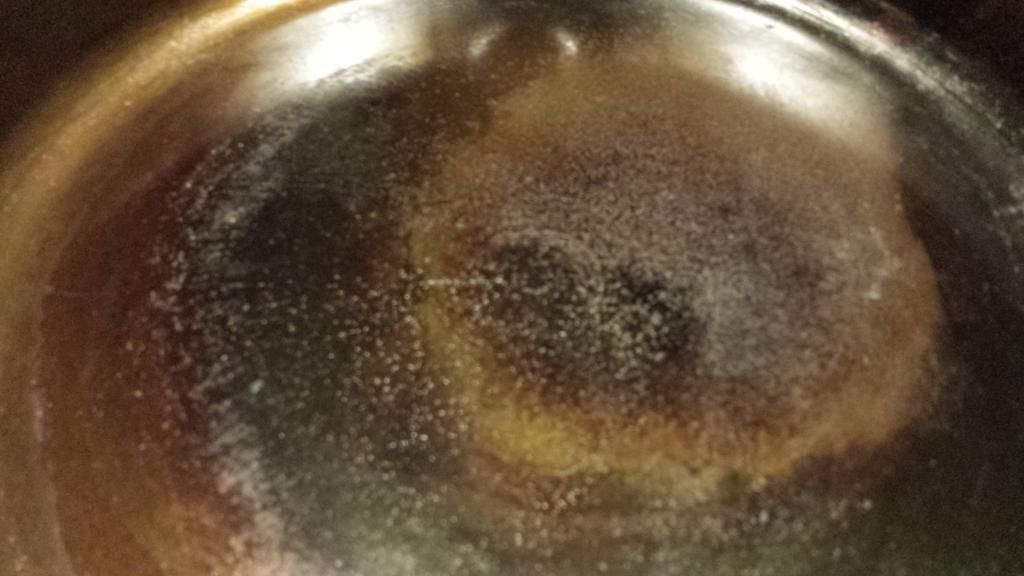
Here's a close up of the same thing. The pitting looks worse in this view, but the pits are very, very shallow:
{Continued in part II}
is a pictorial record of that effort. I'm not going to go over what cast iron seasoning is all about since there are plenty of resources on the web that explains the subject better than I could. So, without further ado...
In the old days cast iron cookware foundries commonly took the extra step of machining (or otherwise grinding) the insides of their skillets to a relatively smooth finish. But today, manufacturers mostly skip this step in order to keep costs down, resulting in a rough, pebbly finish. Needless to say this is not conducive to obtaining a non-stick cooking surface. So in addition to the seasoning I resolved to do something about that issue as well. Unfortunately I forgot to snap a good close-up pic to illustrate the problem, so just take my word for it...it was rough, and unevenly so.
In any event, step one is removing the old half-assed "seasoning" (years of oil build-up). The most commonly recommended method for doing this is burning it off by putting the skillet in an oven on the self-cleaning setting (about 550� or so) for an hour, which burns the old oil deposits to an ash that is then easily removed. Easy, but it smokes like hell. So I decided instead to fire up the little jet engine that is my outdoor propane burner (those crawfish don't boil themselves, y'know) in the hopes that it would to the job in less time (due to the much higher heat it produces) and without setting off every smoke alarm in the house. And it did. After about 5 minutes of the fires-of-hell afterburner setting the oils were reduced to a fine ash:
A little elbow grease and some steel wool removed the deposits and left me with the following ugliness:
The underside was no better. Remember the rust I mentioned?
What to do? The correct answer is always...power tools. Specifically, a variable speed drill and steel wire brush wheel:
OK, much better:
Now, it's time to grind the cooking surface into something that doesn't resemble the surface of the moon. Normally this would call for an angle grinder, but...well...I don't have an angle grinder. And as much as I love an excuse to buy a new power tool my garage is already bursting at the seams with tools, reloading stuff, hunting gear, etc, so I've reached the point where I actually have to justify new toys. So I opted to rely on a $5 adapter I picked up at home depot that allows you to chuck grinder wheels into a drill. Not exactly what a drill is built for, but I figured it could handle a small job like this. I started out with a 60 grit flap wheel:
OK, so controlling a drill while grinding iron ain't easy. It really wants to spin off and into low Earth orbit, but after a little bit I managed to get the hang of it. In short order I not only got down to bare metal, all of the raised spots were gone:
The dark spots you see are pitting, which is pretty bad. But my hope was that by the time the grinding and sanding were done the pits would be minimal and shallow, and easily filled in by multiple coats of polymerized oil (the "seasoning"). Next I switched to an 80 grit flap wheel and repeated the grinding step. The surface is now much smoother, and the depth of the pitting significantly reduced:
Then I switched to a 5" sanding disk and some 120 grit paper. A couple of minutes with that and we're almost there:
Here's a close up of the same thing. The pitting looks worse in this view, but the pits are very, very shallow:
{Continued in part II}
2.) DParker - 07/21/2014
{Part II}
A switch to 180 grit paper and this is the result. Running a finger across the surface feels almost like a brand new stainless steel pan:
By the way...this is what 180 grit sandpaper does to your skin when it's spinning at 1,200 RPM and you get distracted and lose control of it:
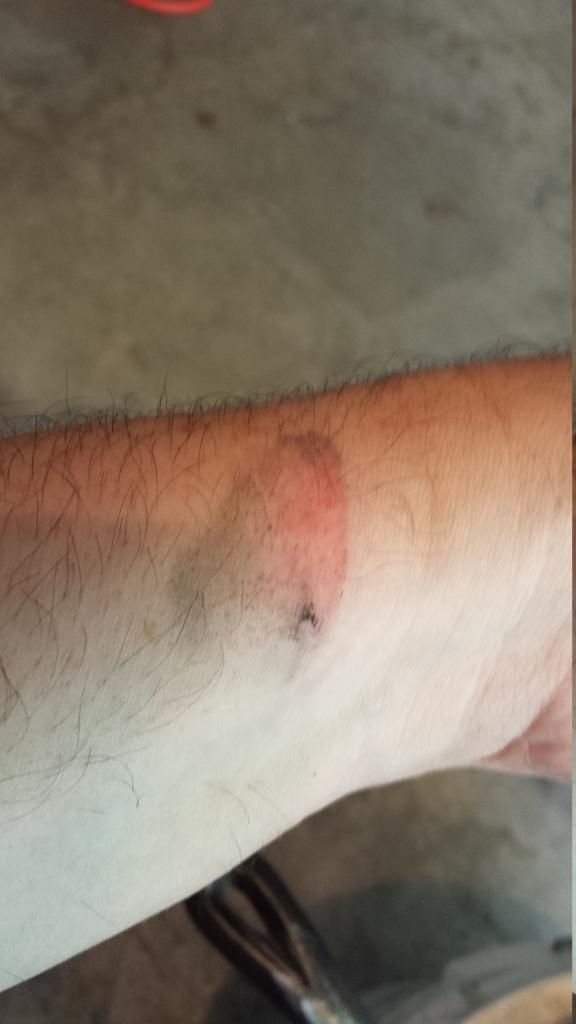
It turns out that you're never too old for the application of a little Bactine. Oh well, time to chuck up a steel cup brush and finish up this act of the play:
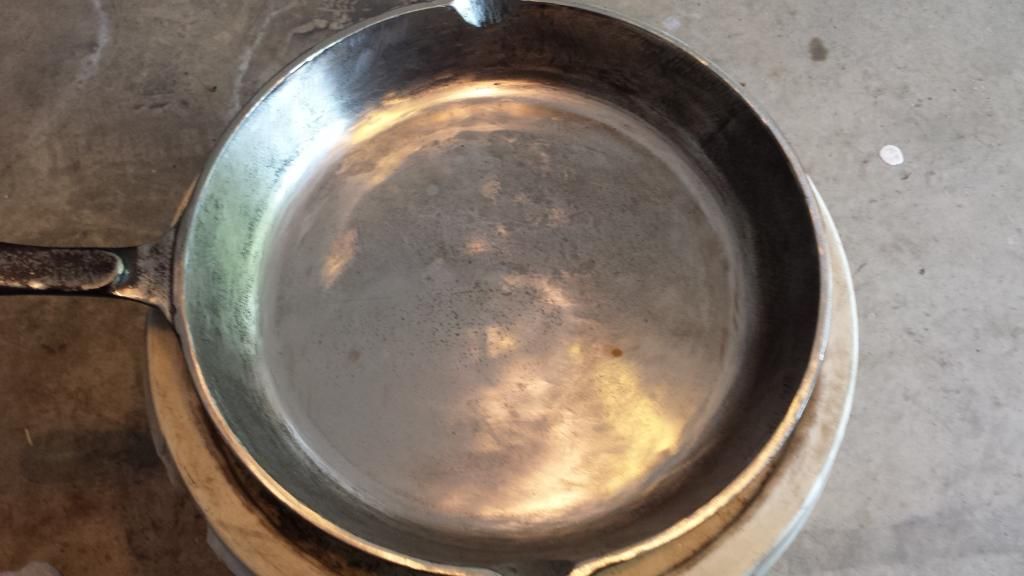
There...clean as a whistle, and smoother than a glass baby's butt:
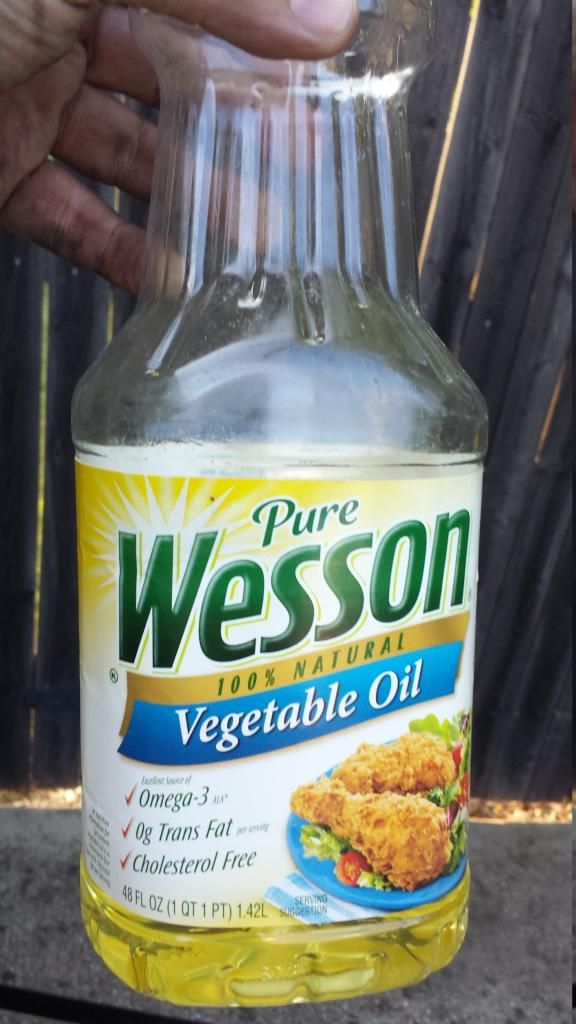
After wiping off the iron dust, soaking the underside in a little vinegar to neutralize any unseen remaining oxidation and rinsing it off it's time to begin the seasoning. My plan is to bake one thin coat of oil onto the underside and 6 thin coats onto the inside, so once again I've opted to put the propane burner to use and take advantage of its high BTU output in order to speed things up, albeit at only about 1/3 of what it's capable of. I'm trying to break down the oil into long-chain polymers, not burn it off. Oh...the oil? Nothing special. Just ordinary vegetable oil:
First, the underside:
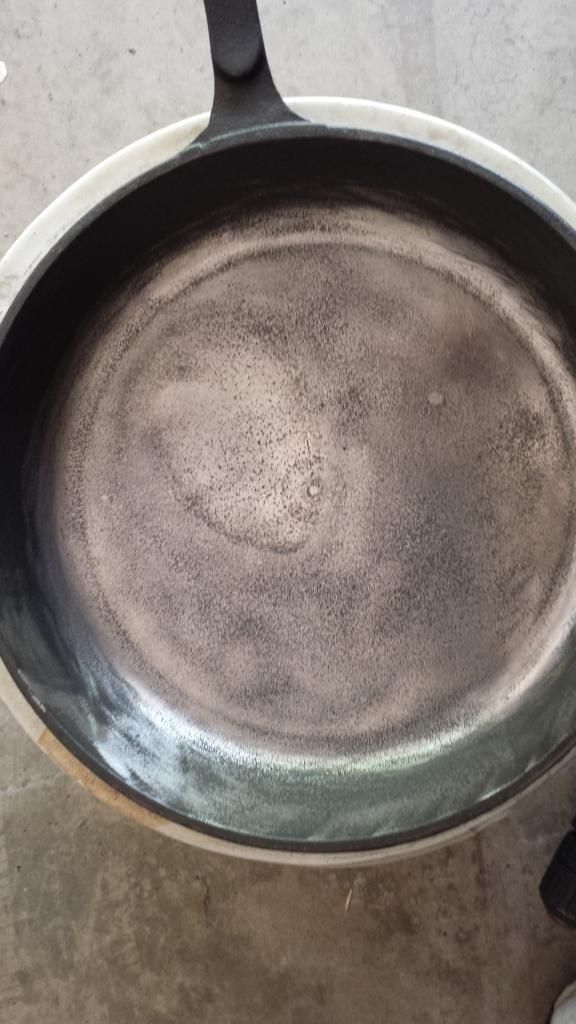
Then the other side. After only 5 minutes the first coat is polymerized and baked on:
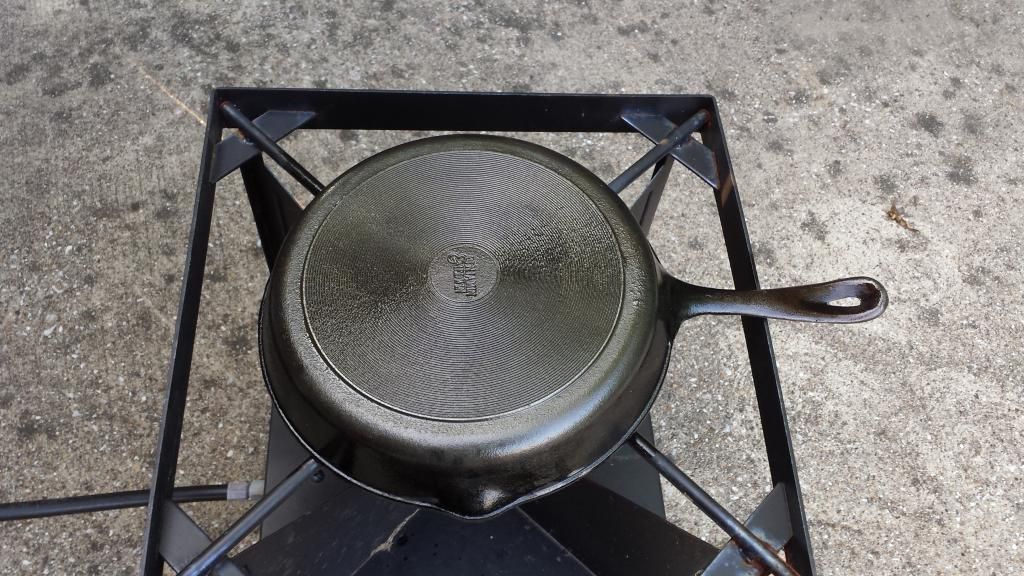
The resulting discoloration is uneven because of the equally uneven heating of the skillet due to the use of an open flame. But I'm hoping that won't cause any problems. After baking on 5 more coats of oil and an hour of cooling down this is the result:
And a close-up:
Despite the appearance of the surface in that photo, it's slicker than snot on a door handle. I really wanted to test it right away by frying an egg without any additional oil, butter or anything else to see just how non-stick the surface is now, but we had already eaten and I didn't want to waste an egg...so that'll have to wait until tomorrow and a follow-up post. I expect that it will stick a little, but hopefully [I]very[/I] little. Little enough that it slides out with just a little nudging from a spatula. We'll see. The suspense is killing me.
A switch to 180 grit paper and this is the result. Running a finger across the surface feels almost like a brand new stainless steel pan:
By the way...this is what 180 grit sandpaper does to your skin when it's spinning at 1,200 RPM and you get distracted and lose control of it:
It turns out that you're never too old for the application of a little Bactine. Oh well, time to chuck up a steel cup brush and finish up this act of the play:
There...clean as a whistle, and smoother than a glass baby's butt:
After wiping off the iron dust, soaking the underside in a little vinegar to neutralize any unseen remaining oxidation and rinsing it off it's time to begin the seasoning. My plan is to bake one thin coat of oil onto the underside and 6 thin coats onto the inside, so once again I've opted to put the propane burner to use and take advantage of its high BTU output in order to speed things up, albeit at only about 1/3 of what it's capable of. I'm trying to break down the oil into long-chain polymers, not burn it off. Oh...the oil? Nothing special. Just ordinary vegetable oil:
First, the underside:
Then the other side. After only 5 minutes the first coat is polymerized and baked on:
The resulting discoloration is uneven because of the equally uneven heating of the skillet due to the use of an open flame. But I'm hoping that won't cause any problems. After baking on 5 more coats of oil and an hour of cooling down this is the result:
And a close-up:
Despite the appearance of the surface in that photo, it's slicker than snot on a door handle. I really wanted to test it right away by frying an egg without any additional oil, butter or anything else to see just how non-stick the surface is now, but we had already eaten and I didn't want to waste an egg...so that'll have to wait until tomorrow and a follow-up post. I expect that it will stick a little, but hopefully [I]very[/I] little. Little enough that it slides out with just a little nudging from a spatula. We'll see. The suspense is killing me.
3.) bluecat - 07/21/2014
[QUOTE=DParker;22086]
So, inspired by something similar in a thread [B]on another forum [/B]I regularly read...
[/QUOTE]
You told us we were the only ones.
So, inspired by something similar in a thread [B]on another forum [/B]I regularly read...
[/QUOTE]
You told us we were the only ones.
4.) Floyd - 07/21/2014
....was that AR-15 dot com?
Great thread DParker.
Great thread DParker.
5.) luv2bowhunt - 07/21/2014
The rust is what makes things taste good, you ruined it.:wink
6.) DParker - 07/21/2014
[QUOTE=Floyd;22101]....was that AR-15 dot com?[/QUOTE]
Yep. Subnet's experiment. I though it was one of the most useful things I've read there in quite some time. Note that I even adopted his testing standard (the fried egg with no fat added to the pan). This is a shameless ripoff in every way. :-)
Yep. Subnet's experiment. I though it was one of the most useful things I've read there in quite some time. Note that I even adopted his testing standard (the fried egg with no fat added to the pan). This is a shameless ripoff in every way. :-)
7.) Wild Bob - 07/21/2014
I've got a fender that needs grinding, sanding, buffing...you look pretty handy with that...interested in a little side work? :-) LOL
Seriously, nice work - its good to the pan saved. I often see neglected Cast Iron dirt cheap at yard sales... this would be the ticket to pick some up and restore it. I've always wanted a second set of CI in our camper, so that we don't always head out camping asking, "Did someone grab the CI frying pan or dutch oven?"
Seriously, nice work - its good to the pan saved. I often see neglected Cast Iron dirt cheap at yard sales... this would be the ticket to pick some up and restore it. I've always wanted a second set of CI in our camper, so that we don't always head out camping asking, "Did someone grab the CI frying pan or dutch oven?"
8.) Swamp Fox - 07/21/2014
Holy cow! I'll have to remember not to post any pics of my skillets...I don't want to be responsible for any shell shock or offers to bring the grinder for a visit...
I doubt I have much pitting, but that first pic looks new from the factory by comparison.
Regarding the vinegar thing and rust...I assume any vinegar is okay? Does the item have to soak or can it merely be wiped and left to sit for a while? Don't know why I haven't run across this idea before, but it makes sense...Sometimes the old steel wool and WD-40 scrub isn't 100%...
9.) DParker - 07/21/2014
[QUOTE=Wild Bob;22132]I've got a fender that needs grinding, sanding, buffing...you look pretty handy with that...interested in a little side work? :-) LOL[/QUOTE]
Thanks, but I'm going to have to pass on self-preservation grounds. Given what I did to my wrist with just a sanding disc I'm thinking that if someone handed me an actual grinder I'd likely end up opening an artery, if not severing the hand completely.
Honestly, the cost and effort of running to the hardware store to buy flap wheels, the sanding disc and paper, the grinder wheel adapter for my drill, etc were more than the skillet is worth. But I was in it more for the fun, and just to see if I could do it.
10.) DParker - 07/21/2014
[QUOTE=Swamp Fox;22142]Holy cow! I'll have to remember not to post any pics of my skillets...I don't want to be responsible for any shell shock or offers to bring the grinder for a visit...
I doubt I have much pitting, but that first pic looks new from the factory by comparison.[/QUOTE]
I really wish I'd remembered to take a clear close-up photo before I started. The issue wasn't as much the pitting as it was the raised bumps (what I referred to as the "pebbly" texture), which were quite pronounced and not evenly distributed across the surface. Those are what really had to go. The pitting just needed to be minimized and then filled up by the polymerized oil, which appears to have happened per expectations. But we'll see if it survives scraping with a steel spatula and what-not.
[QUOTE=Swamp Fox;22142]Regarding the vinegar thing and rust...I assume any vinegar is okay? Does the item have to soak or can it merely be wiped and left to sit for a while? Don't know why I haven't run across this idea before, but it makes sense...Sometimes the old steel wool and WD-40 scrub isn't 100%...[/QUOTE]
I used plain distilled white vinegar. But this is the first time I've used it for rust neutralization, so I'm not sure if there are any gotcha's with using other types. If I had to speculate I'd guess that apple cider vinegar might be OK, but I'd steer clear of things like balsamic. I poured it on and let is sit for just a couple of minutes, then rinsed it off with warm water. Is that the best way? I really don't know. I was just blindly carrying out a step I read about somewhere.
11.) Swamp Fox - 07/21/2014
Gotcha on the pebbly thing...I have one like that, more like gravel...Pebbles would be uptown by comparison...I don't think it started out as my skillet...Probably a good story about where I got it, but not one I remember, LOL...
12.) Swamp Fox - 07/21/2014
It's either vinegar or lemon juice that I use on battery acid and similar corrosion...I can never remember which and always have to look it up...I was never very good at chemistry...Didn't see the point in memorizing that chart, and my teacher was from West Virginia...Plus I was 14 and had better things to do...
13.) bluecat - 07/21/2014
You'll want to use baking soda on battery acid Swamp. Strong acid needs something basic (alkali) to neutralize. Save your lemon juice for writing secret messages to Vertislicer.
14.) Swamp Fox - 07/21/2014
Yeah, I know baking soda is in there somewhere...Like I say, I always have to look it up, LOL
Lemon juice and/or vinegar comes in handy for something I'm doing more frequently than I should...My head's starting to hurt trying to remember what...
Lemon juice and/or vinegar comes in handy for something I'm doing more frequently than I should...My head's starting to hurt trying to remember what...
15.) DParker - 07/21/2014
I think this is a good time to toss in a reminder about never mixing ammonia and bleach.
16.) Swamp Fox - 07/21/2014
LOL...
17.) bluecat - 07/21/2014
[QUOTE=Swamp Fox;22146]It's either vinegar or lemon juice that I use on battery acid and similar corrosion...I can never remember which and always have to look it up...I was never very good at chemistry...Didn't see the point in memorizing that chart, and my teacher was from West Virginia...[B]Plus I was 14 and had better things to do[/B]...[/QUOTE]
It's amazing you didn't go blind.
It's amazing you didn't go blind.
18.) Swamp Fox - 07/21/2014
LMAO!
There are some things safety glasses will not protect you from...
There are some things safety glasses will not protect you from...
19.) bluecat - 07/21/2014
... or develop carpal tunnel.
20.) Deerminator - 07/21/2014
:wink
21.) Floyd - 07/21/2014
[QUOTE=DParker;22109]Yep. Subnet's experiment. I though it was one of the most useful things I've read there in quite some time. Note that I even adopted his testing standard (the fried egg with no fat added to the pan). This is a shameless ripoff in every way. :-)[/QUOTE]
Yep, that site was a way more interesting thread in terms of respondent's participation to the thread.
I like your OP better though. :tu:
Yep, that site was a way more interesting thread in terms of respondent's participation to the thread.
I like your OP better though. :tu:
22.) Deerminator - 07/21/2014
eggs with a side of venison and some home fries and oj
23.) DParker - 07/22/2014
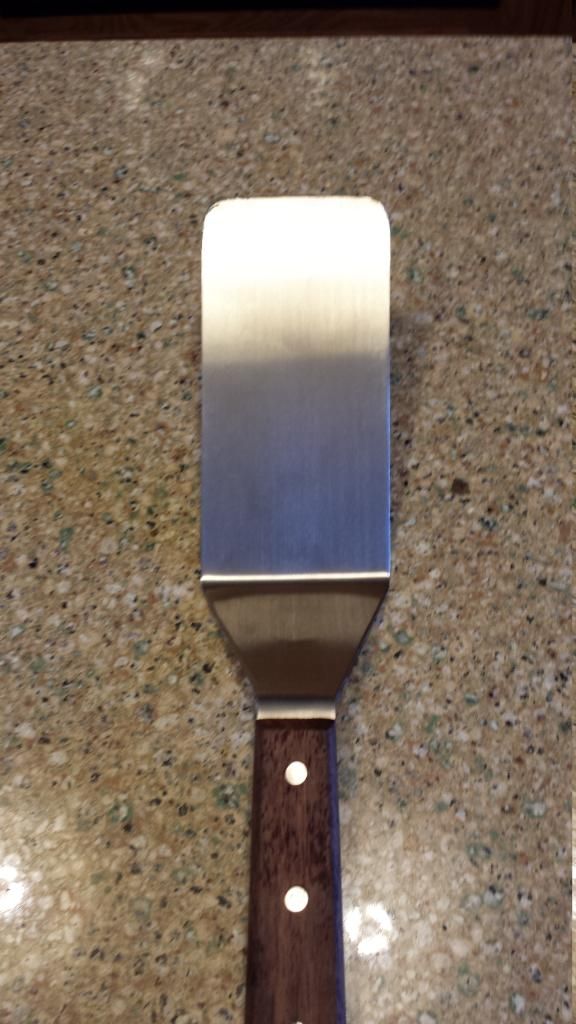
Looking forward to testing the newly seasoned skillet I remembered that all of the spatulas we have are either plastic or wood (can't go damaging those delicate non-stick coatings on the fancy-schmancy pans we have), which will never do. We're cooking with iron. Centuries-old technology for Pete's sake. So I stopped by a local restaurant supply store on the way home today to and picked up this good ol' fashioned basic stainless steel spatula with a wooden handle for the princely sum of $4.95. Brand? Who the hell knows/cares?:
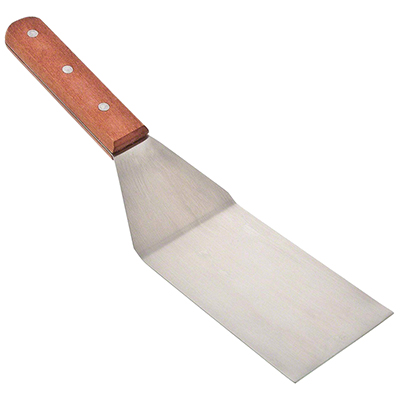
(Forgive the retail stock photo, but I forgot to snap one before what came next.)
Perfect, except for the sharp corners on the leading edge, which won't work when scraping the rounded transition between the bottom and sides of the skillet. No problem. I have a Dremel with a bunch of grinding bits and I'm not afraid to use 'em:
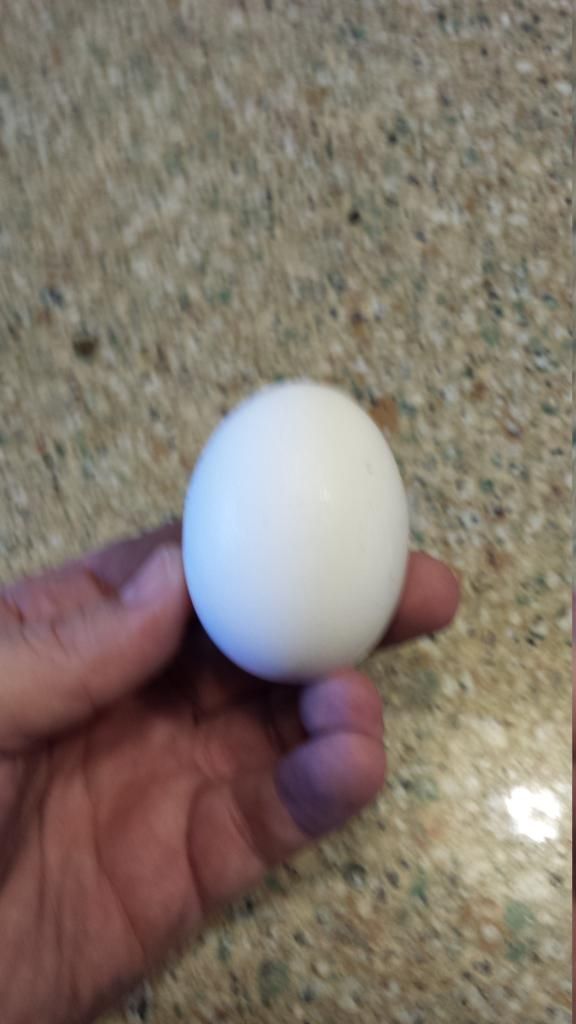
A little rough, but the radiused corners are now a near-perfect fit for the pan. I beveled the leading edge to make it sharp, too. Now, onto the test. This is your brain:
This is your brain on cast iron:
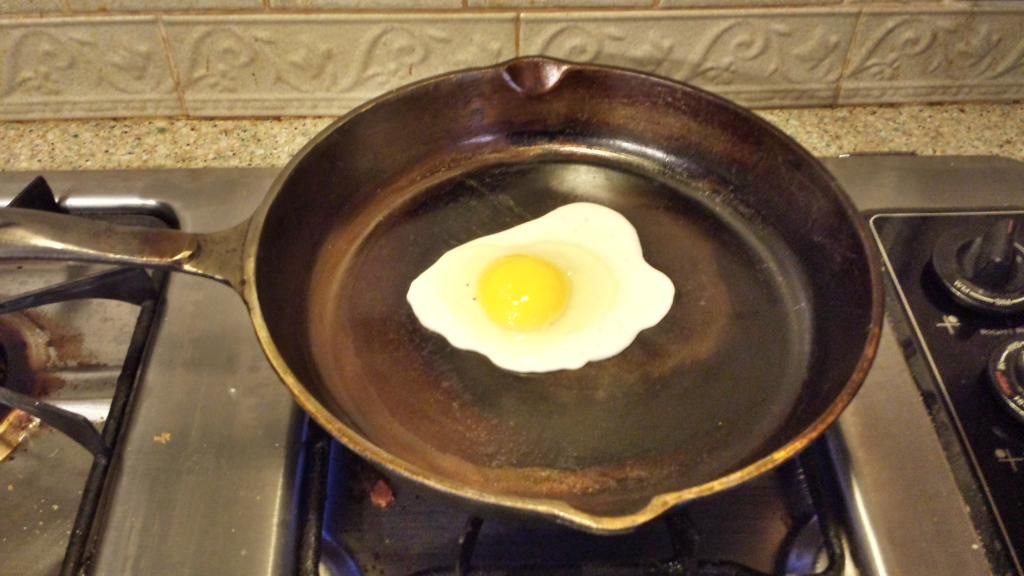
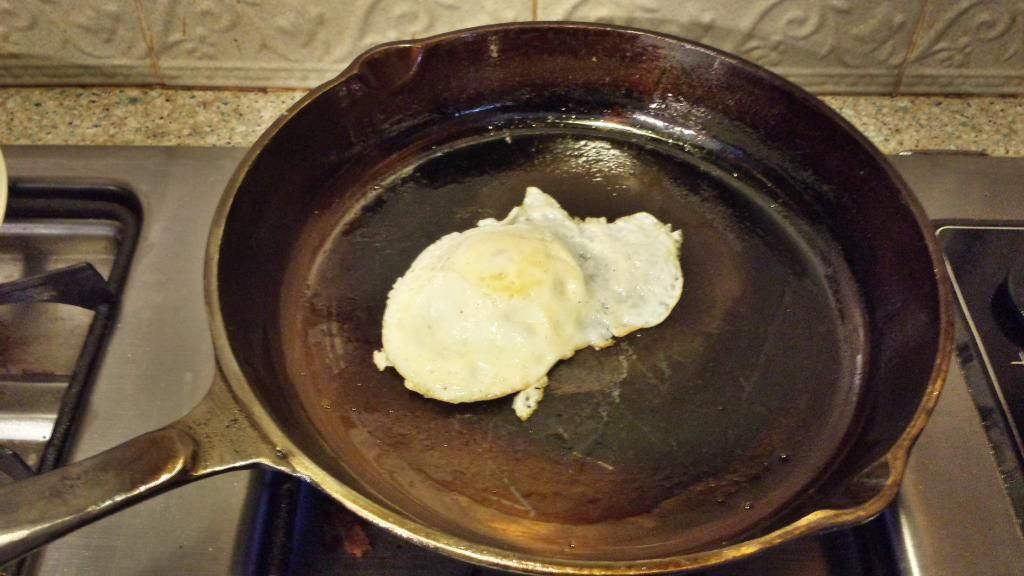
Any questions? (I mean, other than, "Where's the bacon?")
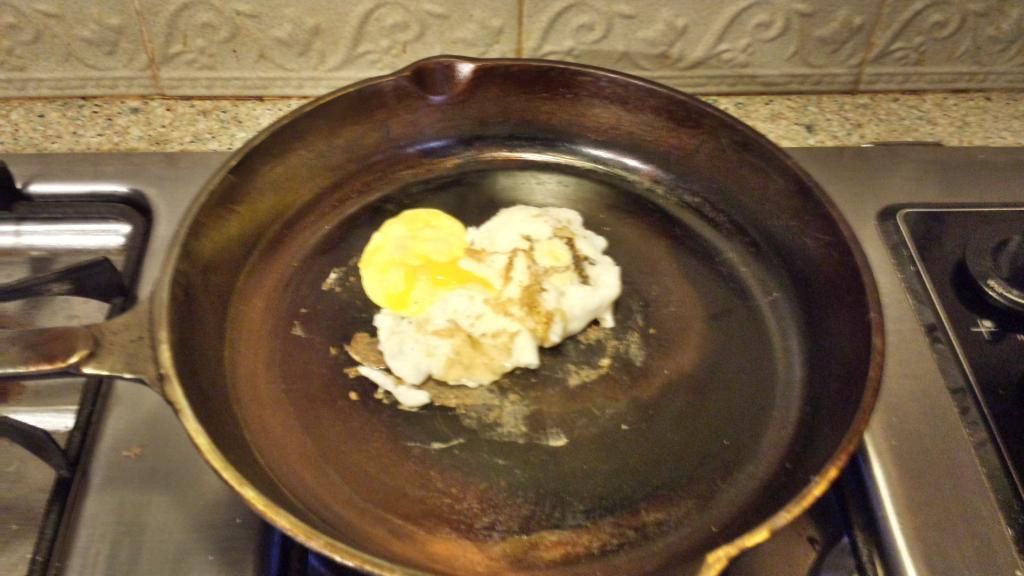
This test involved frying two eggs. The first (seen above) went into the skillet with absolutely no lubrication at all. No oil, no butter...nothing but the baked on seasoning finish from yesterday. As I said before I expected it to stick some, and it did. In fact it stuck a bit more than I expected. Not glued to the surface like it most likely would have when the skillet was in it's previous condition, but enough to make working the spatula under it problematic, resulting in the following mess after turning:
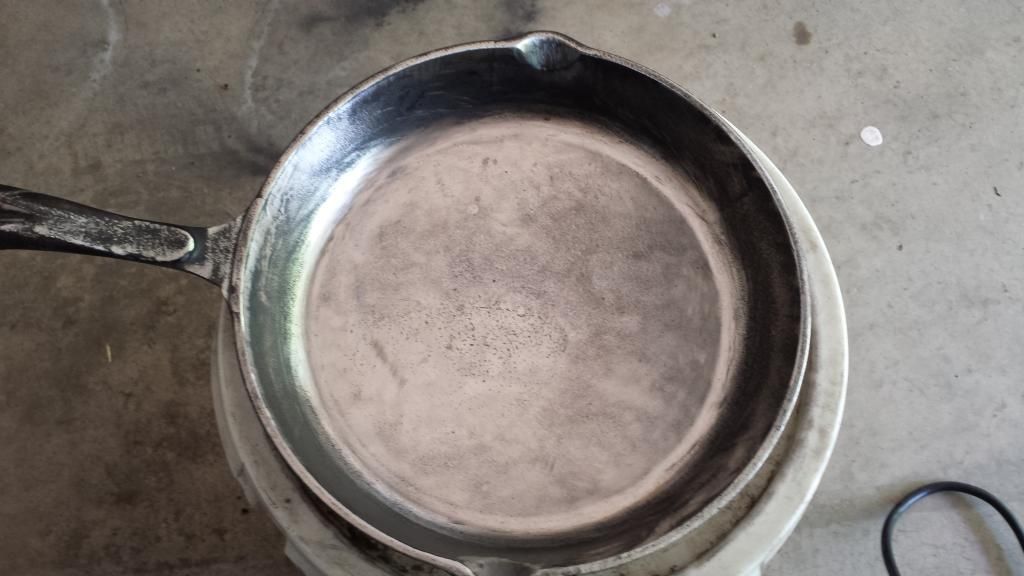
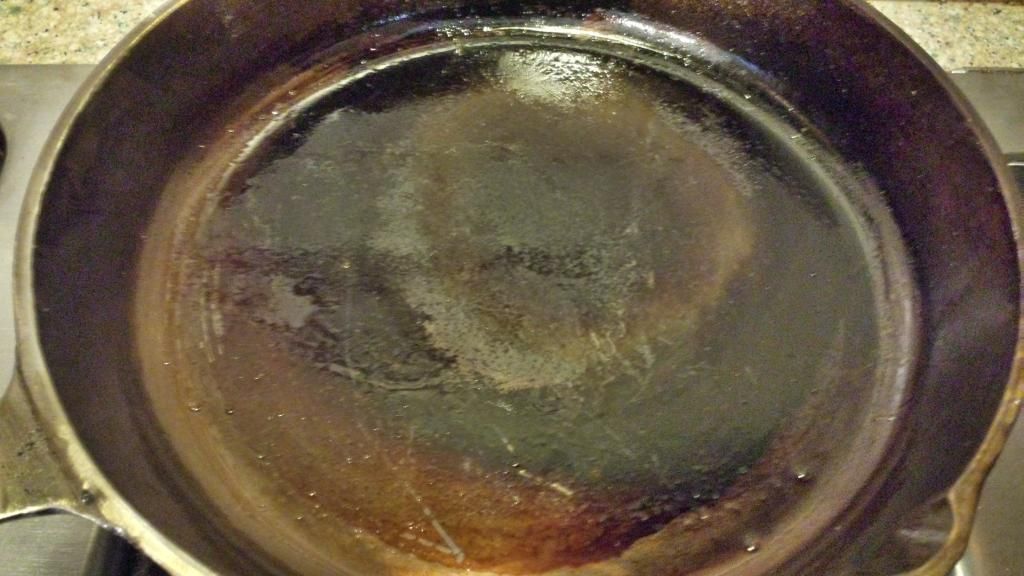
OK, not disasterous, but not an unqualified success either. After a quick scrape with the spatula, a rinse and a wipe-down with paper towels it was on to egg #2. But before it went in I gave the skillet a very, very lite spritz of some spray-on Crisco. The difference was like night vs day. This time the egg slid around the lightly lubed surface like Hans Brinker skating a frozen pond. There was absolutely no sticking anywhere:
And here's the skillet after the egg was taken out. I did no scraping with the spatula nor any cleaning of the surface at all before taking this pic:
Clean up? Rinse with hot water and wipe with a paper towel. Put back on the burner at low heat for just a moment to make sure it's completely dry, then a wipe down of the cooking surface with a few drops of vegetable oil on another paper towel and...back in the cabinet it goes.
We'll still need to see how the seasoned finish holds up in the long run, but for now I feel good about declaring this a successful project, and the skillet a valuable cooking implement that should outlive me and a couple generations to come if taken care of.
(Forgive the retail stock photo, but I forgot to snap one before what came next.)
Perfect, except for the sharp corners on the leading edge, which won't work when scraping the rounded transition between the bottom and sides of the skillet. No problem. I have a Dremel with a bunch of grinding bits and I'm not afraid to use 'em:
A little rough, but the radiused corners are now a near-perfect fit for the pan. I beveled the leading edge to make it sharp, too. Now, onto the test. This is your brain:
This is your brain on cast iron:
Any questions? (I mean, other than, "Where's the bacon?")
This test involved frying two eggs. The first (seen above) went into the skillet with absolutely no lubrication at all. No oil, no butter...nothing but the baked on seasoning finish from yesterday. As I said before I expected it to stick some, and it did. In fact it stuck a bit more than I expected. Not glued to the surface like it most likely would have when the skillet was in it's previous condition, but enough to make working the spatula under it problematic, resulting in the following mess after turning:
OK, not disasterous, but not an unqualified success either. After a quick scrape with the spatula, a rinse and a wipe-down with paper towels it was on to egg #2. But before it went in I gave the skillet a very, very lite spritz of some spray-on Crisco. The difference was like night vs day. This time the egg slid around the lightly lubed surface like Hans Brinker skating a frozen pond. There was absolutely no sticking anywhere:
And here's the skillet after the egg was taken out. I did no scraping with the spatula nor any cleaning of the surface at all before taking this pic:
Clean up? Rinse with hot water and wipe with a paper towel. Put back on the burner at low heat for just a moment to make sure it's completely dry, then a wipe down of the cooking surface with a few drops of vegetable oil on another paper towel and...back in the cabinet it goes.
We'll still need to see how the seasoned finish holds up in the long run, but for now I feel good about declaring this a successful project, and the skillet a valuable cooking implement that should outlive me and a couple generations to come if taken care of.
24.) Deerminator - 07/22/2014
:tu:EXCELLENT!!!!!!
did the same thing to my spatula years ago.:tu::tu:
did the same thing to my spatula years ago.:tu::tu:
25.) Floyd - 07/22/2014
You'd the man
26.) NEBigAl - 07/22/2014
Where'd the pics go!!!
27.) bluecat - 07/22/2014
Congratulations on your new spatula.
28.) DParker - 07/22/2014
[QUOTE=NEBigAl;22224]Where'd the pics go!!![/QUOTE]
They're still there. Photobucket might have been temporarily down when you were viewing the thread.
[QUOTE=bluecat;22230]Congratulations on your new spatula.[/QUOTE]
Thanks. She's adorable, isn't she? The wife and I are very proud.
They're still there. Photobucket might have been temporarily down when you were viewing the thread.
[QUOTE=bluecat;22230]Congratulations on your new spatula.[/QUOTE]
Thanks. She's adorable, isn't she? The wife and I are very proud.
29.) Swamp Fox - 07/22/2014
[QUOTE=bluecat;22230]Congratulations on your new spatula.[/QUOTE]
LOL...
I was skeptical you'd get slip-and-slide performance on the first run just because of the nature of ungreased iron, even seasoned, but it's very cool that the second attempt with oil worked so well. :tu:
I wonder how many people get a Hans Brinker reference these days? A Slick Willie reference maybe, though even that might be a fade judging by the apparent enthusiasm of nostalgic amnesiacs to put him back on center stage. I wonder if Hillary's ever skated on the Zeider Zee? If not, there's always Benghazi...
30.) DParker - 07/22/2014
[QUOTE=Swamp Fox;22239]LOL...
I was skeptical you'd get slip-and-slide performance on the first run just because of the nature of ungreased iron, even seasoned,[/QUOTE]
Yeah...like I said, I was expecting it to stick to some degree. The no-lube test was just about seeing how much.
[QUOTE=Swamp Fox;22239]but it's very cool that the second attempt with oil worked so well. :tu:[/QUOTE]
What was nice was how little oil was required. Literally just a quick stab of the spray nozzle.
[QUOTE=Swamp Fox;22239]I wonder how many people get a Hans Brinker reference these days?[/QUOTE]
You damned kids!!! Get off my lawn!!!
31.) Swamp Fox - 07/22/2014
LOL...
I believe popping in a Ninja Turtles DVD may have replaced reading to the kids about a Dutch boy from the mid 19th century...
Kind of a shame.
I assume the Ninja Turtles are still out there....:re:
I believe popping in a Ninja Turtles DVD may have replaced reading to the kids about a Dutch boy from the mid 19th century...
Kind of a shame.
I assume the Ninja Turtles are still out there....:re:
32.) bluecat - 07/22/2014
[QUOTE=Swamp Fox;22239]
I wonder how many people get a Hans Brinker reference these days?[/QUOTE]
When I read that I had an instant memory of the Indians chasing him over the ice. Loved that book.
I wonder how many people get a Hans Brinker reference these days?[/QUOTE]
When I read that I had an instant memory of the Indians chasing him over the ice. Loved that book.
33.) Swamp Fox - 07/22/2014
LOL...
And then when the Three Billy Goats Gruff showed up, things got really hairy...
:grin:.
And then when the Three Billy Goats Gruff showed up, things got really hairy...
:grin:.
34.) Swamp Fox - 10/25/2015
With the arrival of camping weather (i.e. fewer skeeters, LOL), I got some extra motivation to spiff up one of my skillets, and came across the previously mentioned vinegar wash for the rust-removal phase of reconditioning while I was bopping around on the innerweb looking for what's new in the world of old cookware.
I've never done a whole rust removal job on an entire skillet or pot/Dutch oven, but several places give you directions to soak in a water-and-vinegar solution between the burning and oiling phases. (Actually, after removing as much rust as possible with steel wool or a power tool.) Thought I'd bring it up again, especially since I had some questions about it originally. The link below has a little bit about it.
Also, I ran across several places that recommended against putting older cast iron through an oven self-cleaning cycle during the burn phase. Apparently there's a high risk of cracking or warping the piece (during cool-down, I gather) because older pieces tended to be thinner-walled than modern cookware.
If I wanted to burn something off or remove seasoning, I always put the piece in a fire or buried in coals and left it until the fire burned out. But not everyone is able to do that. A second alternative I found this go-round involves oven-cleaning spray soaks over the course of a few days. Either the fire pit or the oven-cleaner might be more attractive to someone who doesn't want to spend the time or care (or money) on the grinding method.
So, here is the latter method described at one of the better sites I found, if you're interested in this kind of stuff (Reading the comments section is worthwhile for extra info):
[url]http://blackirondude.blogspot.com/2009/01/easy-cast-iron-skillet-reconditioning.html[/url]
35.) DParker - 10/26/2015
If it really works, the oven cleaner sounds like a good alternative if you don't have an appropriate heat source. I just don't have the patience to wait that long...and it's too fun to crank the King Kooker up to 11 and risk 4th degree burns.
36.) Swamp Fox - 10/26/2015
It seems to be a tradeoff. I suppose you can get uneven heat whether you use an open fire or a burner, and you have to be careful with cool-down either way, and there's no checking pans and reapplying cleaner every day or so. But on the other hand, there's no major scouring (apparently) and no time or money that need be invested in power grinding. Kind of a bag-it-and-forget-it method.
I have a couple of skillets I'll probably try it with after hunting season. They're both older skillets (50+ years as best I can tell) and though powering through down to bare metal sounds like it might be fun when no one's playing football, I'm not sure I want my first attempt to be with skillets I can't replace easily and which have been through many excellent adventures with me.
I have a couple of skillets I'll probably try it with after hunting season. They're both older skillets (50+ years as best I can tell) and though powering through down to bare metal sounds like it might be fun when no one's playing football, I'm not sure I want my first attempt to be with skillets I can't replace easily and which have been through many excellent adventures with me.
37.) DParker - 10/26/2015
[QUOTE=Swamp Fox;35738]I'm not sure I want my first attempt to be with skillets I can't replace easily and which have been through many excellent adventures with me.[/QUOTE]
That's a good point. Mine was something we picked up at a department store and wasn't seeing much real use, so ruining it would have been a "Eh, so what" event.
That's a good point. Mine was something we picked up at a department store and wasn't seeing much real use, so ruining it would have been a "Eh, so what" event.
38.) Bob Peck - 10/26/2015
Nice post Mr. Parker! Useful and interesting.
Ironically, I learned today that my local deer processor who I take my donated deer to (Vernon Walker [url]http://www.walkersprocessing.com/[/url]) is a collector/expert in Griswold cookware [url]http://www.griswoldcookware.com/history.htm[/url] He makes a tidy sum at auctions and bartering this iron cookware. Showed me a flat iron pancake skillet he just bought for $35 and sold for $250.
When I was in my teens I did something very similar to your project to my Mom's iron skillet. Proud that I had done a good deed I presented her Grandmother's skillet back to her. If she didn't love me so much I may have died that day. :-)
39.) Swamp Fox - 10/26/2015
LOL..So you're saying you botched the job? :shocked:
I think the key might be using soft bristles, LOL. I think I've heard of stainless steel being recommended for the power tool method. Does that make sense? I suppose that would be softer or more brittle than brass, say? I don't know much about the various grinding attachments. All I know is I was warned off most grinders...by people have seen me in action, LOL...
I think the key might be using soft bristles, LOL. I think I've heard of stainless steel being recommended for the power tool method. Does that make sense? I suppose that would be softer or more brittle than brass, say? I don't know much about the various grinding attachments. All I know is I was warned off most grinders...by people have seen me in action, LOL...
40.) DParker - 08/14/2016
Tonight's dinner: Lazy man's skillet nachos.

"Lazy" refers to the fact that the goal was to keep the preparation to a minimum, and 6 of the 8 ingredients came straight out of cans, bags and a carton.
- 1 large bag tortilla chips (I used a mix of blue and white corn)
- 15 oz can of Wolf chili (No beans!)
- 1.5 cups shredded cheese (I used a Mexican blend)
- 10 oz can diced tomato (you'll only use half of the can)
- 6 oz can sliced black olives
- 2 green onions thinly sliced (stalks included)
- 1 avocado diced
- Sour cream
This is one of those rare occasions where using canned chili is acceptable (the wife was going to be eating these too, so I had to opt for the "mild" version of Wolf...medium or hot would be better though). Preparation is simple:
1. Preheat the oven to 375 (150 if you're using Swampy's roux incinerator).
2. Heat the chili per instructions on the can.
3. Completely cover the bottom of a 12" skillet with a single layer of tortilla chips.
4. Ladle half the chili evenly over the chips.
5. Spread half the cheese over the chili.
6. Sprinkle half the green onions, olives and chopped tomato over the cheese.
7. Lay down another layer of chips and repeat steps 4-6.
8. Pop into the oven for 5 minutes, or until the cheese is well melted.
9. Take the skillet out and divvy up the nachos onto plates.
10. Top with diced avacados and a little sour cream.
11. Have a beer or four.
41.) bluecat - 08/15/2016
Looks great. We do almost the same thing although we brown the ground beef, then layer like you did on a cookie sheet. Very tasty. Probably my favorite Mexican style meal other than the taco.
42.) bluecat - 08/15/2016
The sour cream is a must!
43.) Swamp Fox - 08/15/2016
Tell me more about this Mexican cheese...

44.) bluecat - 08/15/2016
Lol! Good to know.
45.) DParker - 08/15/2016
[QUOTE=Swamp Fox;43114]Tell me more about this Mexican cheese...[/QUOTE]

Cheap and easy, like you like your.....er.....cheese.
Cheap and easy, like you like your.....er.....cheese.
46.) Swamp Fox - 08/15/2016
I don't think I've ever noticed that at the Piggly Wiggly.
This gives me an excuse to work on some conversation-starters in the dairy aisle...

This gives me an excuse to work on some conversation-starters in the dairy aisle...
47.) DParker - 08/15/2016
[QUOTE=Swamp Fox;43120]I don't think I've ever noticed that at the Piggly Wiggly.
This gives me an excuse to work on some conversation-starters in the dairy aisle...[/QUOTE]
You forget.....fresh produce is where the action's at.

This gives me an excuse to work on some conversation-starters in the dairy aisle...[/QUOTE]
You forget.....fresh produce is where the action's at.
48.) Swamp Fox - 08/16/2016
I've been slapped for being fresh in Produce, gotten a chilly reception in Frozen Foods...I don't even want to talk about the Meat Department...I'm really, really hoping success lies in going with the flow in Dairy...
49.) DParker - 08/16/2016
[QUOTE=Swamp Fox;43122]...I'm really, really hoping success lies in going with the flow in Dairy...[/QUOTE]
Well, cheese...you'd butter milk it for all it's worth.
Well, cheese...you'd butter milk it for all it's worth.
50.) Swamp Fox - 08/16/2016
A lot of the best-looking women don't love me, but I do okay on the margarines...
51.) bluecat - 08/16/2016
[QUOTE=Swamp Fox;43122]I've been slapped for being fresh in Produce, gotten a chilly reception in Frozen Foods...I don't even want to talk about the Meat Department...I'm really, really hoping success lies in going with the flow in Dairy...[/QUOTE]
Stay out of the dog food aisle.
Stay out of the dog food aisle.
52.) Swamp Fox - 08/16/2016
The cat food aisle hasn't lived up to its billing, either...:wink